So I decided to make my own triangle hip scarf that I could wear for belly dance and to keep my shoulders a little warm when I need it.
I searched high and low on the internet and finally found a pattern that I could follow and tweak.
Materials:
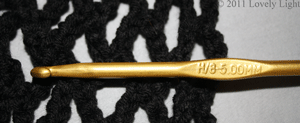
Crochet needle of your choice; I used a H/8- 5 mm
Yarn of your choice (I needed over 100 grams, but less than 200, of 100% Acrylic low pill yarn)
Pattern:
 |
| Foundation chain and Row 1. |
Foundation Row: Chain on as many stitches as you need for the length you want. I made it as long as my arms stretched out. Try not to pull on the chain as you’re measuring/trying it’s length on.
Slip stitch into the last chain. Chain 5 stitches. (you can do 3 or 7, as long as it’s an odd number, for this type of netting. The size of the netting will vary based upon your hook size, yarn, and number of chains you make). Single crochet into every fourth and fifth stitch of the foundation row. Continue until you reach the end. Single crochet last stitch.
Row 2 and on:
 |
| Half-way done! |
 Slip stitch in next 3 stitches of last chain of 5 (you’re kinda back tracking here). Chain 5. Single crochet in the 3rd stitch (the center stitch) of the next 5 chain loop. Continue in this manner until the end. Turn and repeat. You will have one less chain 5 loop in each row. Continue repeating this until you attach your last chain 5 loop with a single crochet.
Edging: Slip stitch around the entire edging.
When I got to the two main “corners” I realized that I actually needed it longer.
If you find yourself in this position, here’s what you do: At the corner, chain as many stitches as you need for that side (remember to do only half the chains you need total because you will beading the others at the other “corner” this will make a little tab or ties – not more netting). Then slip stitch back and continue on to the other corner. Add on more stitches here if you need to. Continue to the bottom point.
 |
| The "tie" that I created for extra length. |
Begin picot edging by chaining 3, then slip stitch into first chain stitch. Single crochet in next chain. Repeat until top corner. (You can actually space our your picot bobbles by adding more single crochet in between, but I liked them closer together.)
 |
| The bottom point. |
At the corner, continue picot onto the tie. I wanted it to “taper off” (see above picture) so I stopped the picot a few stiches before the end and flipped it to start on the top. On the way to the next corner, I decided that I didn’t want picot on the top edge, so I just single crocheted it to the next corner.
Stop before the end of the tie and flip, to begin picot on the next side all the way to the point. Finish and tie in ends.
 |
| Me the model, hubby the photographer. |
A good video tutorial for picot edging is here.
 |
| You can see the width and length here. |
In a future post, I will demonstrate how I am going to add some beaded fringe!
If you have any questions just post a comment or e-mail me!
I'll be linking up to several blog linkys and hops. Check them out here, and here.
My hubby's blog is here.
My hubby's blog is here.
Song of the day: Keep it Loose, Keep it Tight by Amos Lee. To remind us how to work our stitches; and how to take our steps in life.